Compressing game screenshots: the colour limit hiding in JPEG, WebP and AVIF
A screenshot from a modern console is a 4K PNG of several megabytes. Posting one to a forum means making a smaller copy, and the question is how small it can get before it visibly suffers. I run a small image host for exactly this, and I wanted to know why my screenshots were coming out so well compressed. Claude, the AI assistant that runs my home server, built the host and had chosen its settings by convention. So answering properly meant measuring them.
The test image throughout is one screenshot from Outbound, a cosy camper-van game by Square Glade Games.
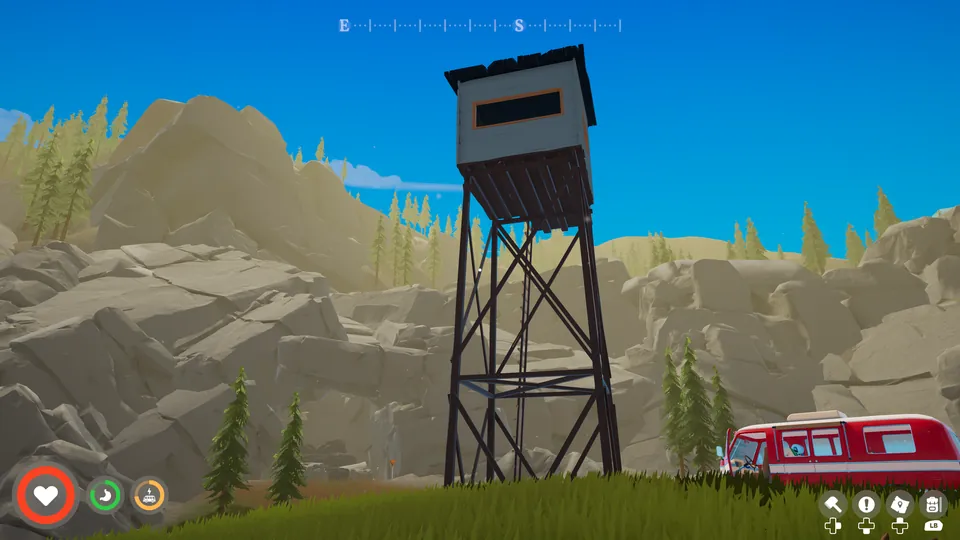
Measuring what you can see
Choosing between image formats and compression settings means comparing each copy with the uncompressed original, and that needs a way of measuring the change as a metric.
The standard choice is SSIM, the structural similarity index published by Zhou Wang and colleagues in 2004. It is also built into ffmpeg.
SSIMULACRA 2 isn't widely known, but it was built for exactly this comparison, and is part of the reference JPEG XL library.
We also needed a ground truth, so I ranked four files by eye, zoomed in beside the original.
| File | My eye | SSIM | SSIMULACRA 2 |
|---|---|---|---|
| JPEG XL default | 1st | 3rd | 1st |
| AVIF quality 60 | 2nd | 1st | joint 2nd |
| WebP quality 82 | 3rd | 2nd | 4th |
| JPEG quality 82 | 4th | 4th | joint 2nd |
Neither score matches mine exactly. SSIM gets the order of AVIF, WebP and JPEG right, but it ranks JPEG XL only third.

Original

JPEG XL, default
eye 1st · SSIM 3rd · SSIMULACRA 2 1sthold to compare

AVIF quality 60
eye 2nd · SSIM 1st · SSIMULACRA 2 joint 2ndhold to compare

WebP quality 82
eye 3rd · SSIM 2nd · SSIMULACRA 2 4thhold to compare

JPEG quality 82
eye 4th · SSIM 4th · SSIMULACRA 2 joint 2ndhold to compare
SSIMULACRA 2 got closest. It picks the same winner, which is the call that matters most, and its main slip is rating JPEG as highly as AVIF. So every score in the rest of this post comes from SSIMULACRA 2.
Comparing every setting side by side
With a score we trusted, Claude built a comparison page and ran every setting through it: 35 in all, across the four formats. Each result sits beside the lossless original, cropped to five regions of the frame that test different things, from grass texture to small lettering. Holding down on a result swaps the original into the same spot, which shows differences far better than looking side to side. Try it on the row below.
One row of the comparison page, live. Hold down on the result to see the original in its place, and switch regions above it. Every setting gets a row like this, with its score and size.
Most results behaved as expected: higher quality meant a bigger file and a better score. One kind didn't. JPEG and AVIF both have an option to keep what the page calls full-resolution colour. I noticed that AVIF at quality 60 with it looked better than AVIF at quality 70 without it, in a smaller file. JPEG did the same.

Original

AVIF quality 70
half-resolution colour
128.8 KB · score 75.3hold to compare

AVIF quality 60
full-resolution colour
112.4 KB · score 76.9hold to compare
| Setting | Size | Score |
|---|---|---|
| JPEG quality 82 | 198.9 KB | 72.4 |
| JPEG quality 82, full-resolution colour | 259.7 KB | 79.7 |
| JPEG quality 90 | 282.8 KB | 77.3 |
| AVIF quality 60 | 96.8 KB | 72.4 |
| AVIF quality 60, full-resolution colour | 112.4 KB | 76.9 |
| AVIF quality 70 | 128.8 KB | 75.3 |
In both formats, full-resolution colour at the lower quality scores higher than the default at the higher quality, and the file is smaller too. A higher quality setting normally buys a better image with more bytes. Here a colour option did better with fewer, so the default must be losing something that extra quality can't win back. Finding out what became the rest of this investigation.
The colour ceiling
The answer is in a step that every lossy format takes before compression starts.
JPEG, WebP and AVIF all start with the same move. The image is converted from red, green and blue (RGB) into one brightness channel and two colour channels, known in encoder settings as YUV. Brightness runs from black to white, but each colour channel runs from one colour to its opposite, with grey in the middle: U (Cb) goes from yellow to blue, and V (Cr) from green to red. Human vision resolves fine detail in brightness far better than in colour, and splitting a real frame shows how much that matters. Nearly all the detail lives in brightness.
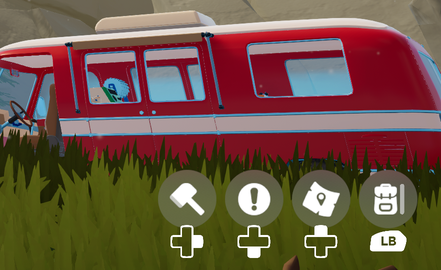
Original
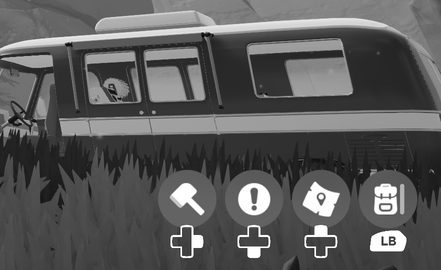
Brightness
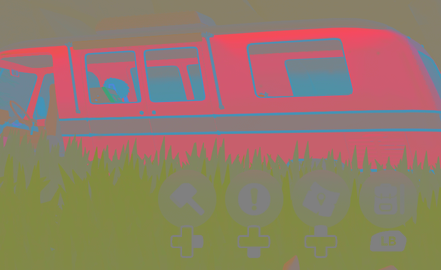
Colour
Next, the two colour channels are stored at half the resolution, so a 1920×1080 frame keeps its colour at 960×540. That keeps one colour value for every square of four pixels and discards three-quarters of the colour data. In effect, a half-resolution colour layer sits over a full-resolution brightness layer.
This is called 4:2:0 chroma subsampling. Chroma means colour, and the three numbers say how much of it survives. The numbers count colour samples in a reference strip that is always 4 pixels wide and 2 rows high. The first number is that width, so it is always 4. The second is how many colour samples the top row keeps across its 4 pixels. The third is how many new colour samples the bottom row adds, and 0 means it reuses the top row's. So 4:4:4 keeps colour for every pixel, 4:2:2 keeps one colour for each side-by-side pair, and 4:2:0 keeps one colour for each 2×2 square.
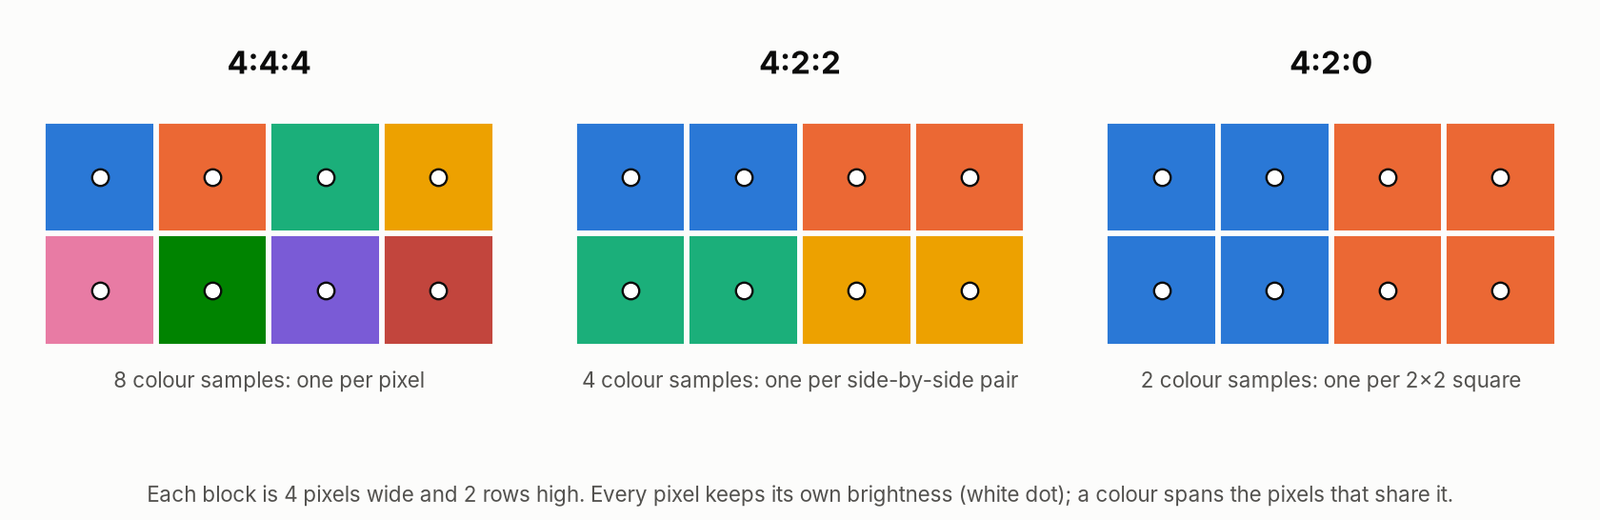
All three keep brightness for all eight pixels. 4:2:2 shares one colour between each side-by-side pair, and 4:2:0 stores one colour for each 2×2 square, so a colour edge can only change every other pixel.
4:2:0 is the default for standard JPEG and for AVIF. Lossy WebP has no other option: every lossy WebP image has its colour at half resolution. As the rest of this post shows, that quietly limits how good any WebP can look.
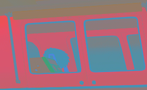
Colour, full resolution
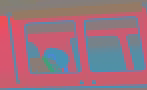
Colour, half resolutionhold to compare
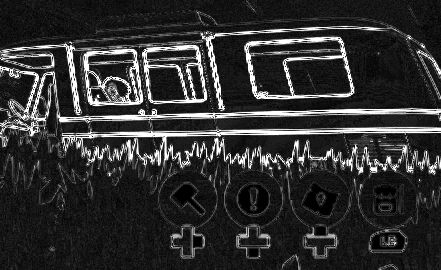
When the image is displayed, the half-resolution colour channels are recombined with the full-resolution brightness channel. Most of the picture looks identical. A difference map, which shows how far each pixel has moved from the original, reveals where it doesn't.
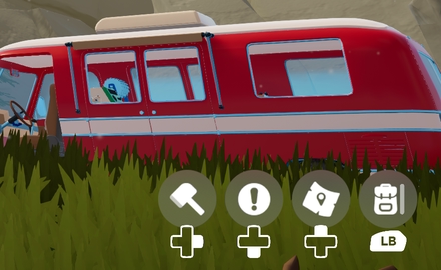
Colour halved, recombinedhold to compare
Difference × 6
The white icons on grey survive almost untouched. Their edges are changes in brightness rather than colour, so they are stored in the full-resolution brightness channel. The loss is on edges where the colour changes: red against blue trim, red against green grass.
Nothing has been compressed yet, but some quality loss is already locked in. Halving the colour channels takes the raw 1920 × 1080 pixel data from 5.9 MB to 3.0 MB, and no later setting can bring that colour detail back.
Halving the colour loses detail before compression starts, but how much does that cost on its own? To find out, Claude left compression out entirely. It converted the screenshot from RGB to YUV, converted it straight back to RGB, and scored the result against the original. It did this once at 4:4:4 and once at 4:2:0.
| Step | Score |
|---|---|
| RGB to YUV and back, 4:4:4 | 92.1 |
| RGB to YUV and back, 4:2:0 | 79.9 |
| JPEG at its highest quality, 4:2:0, 918 KB | 80.1 |
| JPEG at its highest quality, 4:4:4, 1.49 MB | 92.1 |
The score falls to 79.9 before any compression happens. So with the ordinary conversion, standard JPEG, lossy WebP and default AVIF can never score much above 80 on this image. JPEG at its highest quality lands right on that limit.
That explains the surprise from the comparison page. The full-resolution 4:4:4 colour option keeps the detail that 4:2:0 throws away, which no amount of extra compress quality can bring back.
What we chose
The comparison pointed to full-resolution colour, and the smallest good option was AVIF at quality 60 with it: 112 KB and a score of 76.9. The catch was browser support. Full-resolution colour in AVIF needs a less common variant of the AV1 video codec it is built on, called the High profile. Chrome and Firefox decode it, but we couldn't test Safari on an iPhone or a Mac. A reader whose browser can't decode an image doesn't see a slightly worse picture. They see a broken one. My condition was simple: better colour, but no reader ever sees a broken image.
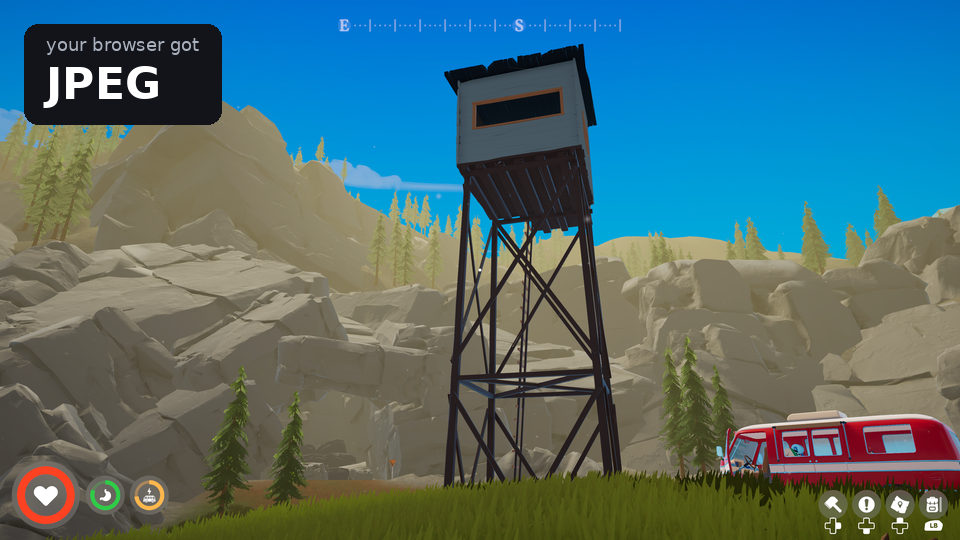
The answer was not to choose one format. Every upload is now stored in four formats under one name, and the link I post ends in .jpg. When a browser fetches an image, it sends an Accept header listing the formats it can show. Chrome's includes image/avif, and Safari 17 and later also list image/jxl for JPEG XL. The host reads that list and sends the best copy the browser says it can show, from the same URL.
This blog does the same for the picture below. Its address ends in .jpg, and the label in the corner shows which copy your browser was sent.
negotiated.jpg.
| Copy | Size |
|---|---|
| AVIF | 41.4 KB |
| JPEG XL | 49.5 KB |
| WebP | 49.6 KB |
| JPEG | 89.8 KB |
| Rank | Copy | Size | Score | Who gets it |
|---|---|---|---|---|
| 1 | AVIF quality 60, full-resolution colour | 112 KB | 76.9 | Browsers that list AVIF, apart from Apple's: Chrome, Firefox, Android |
| 2 | JPEG XL distance 2.5 | 133 KB | 78.5 | Browsers that list JPEG XL: Safari 17 and later |
| 3 | WebP quality 82, sharp YUV | 128 KB | 72.9 | Browsers that list WebP: Safari 16 |
| 4 | JPEG quality 82, full-resolution colour | 260 KB | 79.7 | Everything else. Every browser can show it |
AVIF comes first because it is the smallest. JPEG XL at AVIF's size scores about the same, so a browser that lists both gets the fewer bytes. JPEG XL, like the others apart from WebP, keeps colour at full resolution.
The chart needs JavaScript. The four copies the host serves are in the table above.
Apple's browsers never get AVIF. Their Accept header says AVIF but not which variant, and the High profile is the part we couldn't verify. That covers every browser on an iPhone, because they all use Apple's engine underneath. Safari 17 and later get JPEG XL instead, and older Safari gets WebP.
To test it, Claude requested one link with the headers each browser sends and checked which file came back. Then it loaded the same link in current Chromium, Firefox and WebKit, the engine behind Safari. All three showed the image: Chromium and Firefox received AVIF, and WebKit received JPEG XL. The forum works with this because its readers' browsers fetch images straight from the host. The host's logs show forum readers' own Firefox and Chrome making every request.
The whole choice is a few lines of nginx configuration. The host keeps every copy under the same name with a different extension:
map $http_accept $accepts_avif { default 0; "~*image/avif" 1; }
map $http_accept $accepts_jxl  { default 0; "~*image/jxl"  1; }
map $http_accept $accepts_webp { default 0; "~*image/webp" 1; }

# Every Chromium browser says "Chrome/"; every Apple browser says "AppleWebKit" without it.
map $http_user_agent $apple_webkit { default 0; "~Chrome/" 0; "~AppleWebKit" 1; }

# First match wins: AVIF unless Apple, then JPEG XL, then WebP, then JPEG.
map "$accepts_avif$apple_webkit$accepts_jxl$accepts_webp" $best {
    "~^10"     avif;
    "~^..1"    jxl;
    "~^...1$"  webp;
    default    jpg;
}
map "$best:$uri" $negotiated {
    "~^(?<ext>avif|jxl|webp):(?<stem>/\w+)\.jpg$"  "$stem.$ext";
    default                                         $uri;
}

location ~ \.jpg$ {
    add_header Vary "Accept, User-Agent" always;
    proxy_pass http://127.0.0.1:8000$negotiated;
    proxy_intercept_errors on;
    error_page 404 = @jpeg;        # that copy doesn't exist: send the JPEG
}
location @jpeg { proxy_pass http://127.0.0.1:8000$uri; }
The Vary header tells any cache along the way that the same URL can return different files. The fallback means older uploads, which have only a JPEG, keep working.
The WebP copy is the host's previous setting, WebP at quality 82 with sharp YUV. Claude picked quality 82 before measuring anything, because it is a common default. With sharp YUV, dropping to 75 saves 26% of the bytes but costs 7.6 points, and going up to 90 costs 50% more bytes for the same 7.6 points. For a copy that only older Safari receives, 82 is a sensible middle.
WebP can't keep full-resolution colour, but it can halve the colour more carefully. Sharp YUV is an option in libwebp, Google's WebP library, that changes only the step where the image is split into brightness and colour.
The ordinary split works out the brightness and colour values once and moves on. Sharp YUV checks its own work. It scales its half-resolution colour back up, recombines it with the brightness, and compares the result with the original. Then it adjusts both brightness and colour to close the gap, for up to four passes. The colour is still at half resolution, but far less is lost in halving it, and that lifts the ceiling itself. At its highest quality, WebP with sharp YUV scores 85.9 on this screenshot, where plain WebP stops at 78.3. Full-resolution colour still goes further, to 92.1. At quality 82 it gives 128 KB and a score of 72.9.
On the chart, the WebP line uses sharp YUV throughout, and it crosses 79.9 at quality 90.

Original

WebP q82hold to compare

WebP q82, sharp YUVhold to compare

its error × 4

its error × 4
On this screenshot sharp YUV added 7% to the size and 2.7 points to the score. Raising the quality to 85 instead costs twice as many extra bytes for less gain: 14% for 1.7 points. The output is ordinary WebP. Claude decoded the same file in Chromium, Firefox and WebKit, the engine behind Safari, and all three produced identical pixels, so sharp YUV costs nothing in compatibility.
There is one trap. Python's Pillow library, the usual way to write WebP from a script, has no sharp YUV option, and it doesn't complain if you pass one.
from PIL import Image
im = Image.open("screenshot.png")
im.save("a.webp", quality=82, method=6)
im.save("b.webp", quality=82, method=6, use_sharp_yuv=True)
With Pillow 12.3 the two files come out byte-for-byte identical. To get sharp YUV you need cwebp, libwebp's own command-line encoder, where it is the -sharp_yuv flag:
cwebp -q 82 -m 6 -sharp_yuv -metadata none screenshot.png -o screenshot.webp
-m 6 asks the encoder to try harder. -metadata none is already the default, spelled out so that no camera or location data is ever copied. The host resizes to 1920 pixels with Pillow first, then hands the result to cwebp.
Try it on your own screenshots
Everything here comes from one script run on one screenshot, and both are in the compression-lab repository. That includes the comparison page, with all 35 settings and all five regions, which you can also open here on this blog without installing anything.
The page is already built in the repository's docs folder, so seeing it needs only Python. Running the whole comparison on your own screenshot also needs cwebp and an ffmpeg built with JPEG XL support. Your screenshot should be 16:9, ideally 3840 × 2160, and the run takes about three minutes.
git clone https://github.com/JPain/compression-lab
cd compression-lab
python3 -m venv .venv
.venv/bin/pip install -r tools/requirements.txt
.venv/bin/python tools/generate.py your-screenshot.png --out docs
cd docs && python3 -m http.server 8000
Then open http://localhost:8000. Skip the generate.py line to browse the Outbound results instead.
Whatever your screenshots look like, the order of questions is the same. First check whether your format stores colour at half resolution. If you can keep full-resolution colour, do that before spending a single byte on higher quality. If you can't choose your readers' browsers, you don't have to choose one format either: store several and let each browser say which it can show. And if you're stuck with WebP, use sharp YUV.